Monday, January 31, 2011

Making Naan

I decided to try to make a bread that I love but haven't made before. That was pretty easy to do, because I seldom make bread. In addition, I rarely, if ever, make bread by hand. If I make bread, I buy a bread machine mix at the grocery and use my bread machine. Unfortunately, that won't work for naan.
After much angst and research, I decided to use the Fine Cooking naan recipe (found here: http://www.finecooking.com/recipes/homestyle_indian_naan.aspx). I was going to  make one batch in the regular oven and one in the convection oven. But the regular oven only took 4 minutes to cook the bread so I decided to add topping the second day instead.

Without repeating the recipe which is available at the link above, here is what I did:
Yes, I used a mixer to mix the ingredients
Slowly adding the flour. I did the last mix of mixing by hand.
Finished mixing; time for kneading.
I put the dough in my favorite bowl to rise overnight.
It's finished rising. I should have used a bigger bowl!


The dough is ready to be worked with.
Half of the dough ready to be divided.

The other half in a plastic bag.


The dough is divided into 5 parts


and buttered.


After the dough was allowed to rise, I shaped the dough into 6 inch ovals.

All ready to go on the pizza stone
The biggest issue was getting the naan onto the pizza stone. The first time I foolishly tried to place it on the stone with my hands. It did not work well (the naan was still tasty).
Opps! They did not go onto the pizza stone as planned
Not quite perfect but still tasty
I regrouped and strategized and used a cookie sheet (without a rim) the second time. It worked like a charm! I think it would have worked better if I had a peel but I don't.
Taking the nann off of the pizza stone onto a cookie sheet
The second day was much easier because I knew what to expect. I heated the oven to 475 F/246 C/ Gas Mark 9, put the pizza stone in the oven, and got the dough out of the refrigerator. The dough was still soft and pillowy unlike the pelimini dough I am used to working with. I followed the same steps as yesterday, expect this time I used a convection oven and added toppings. The results? We liked the naan baked in the convection oven better. It was lighter and cooked more evenly. It also had to be watched more closely because it cooked faster.
We also loved naan with toppings. We did the traditional garlic naan (topped with olive oil, crushed garlic, and Kosher salt). I loved the garlic naan.
Garlic naan

Herbs de Provence naan


Naan brushed with butter and topped with cinnamon and sugar


Was it any good -- well it was gone as soon as I made it.  The bottom line -- will I make it again. It was a fair amount of work and I have flour all over my kitchen. I have flour allover my camera. It is difficult taking pictures with flour-covered hands and working with dough. But it was fun work and I often make a mess when I cook. I really enjoyed making the naan. Most importantly, I have to try more toppings on the naan. So yes, I will make it again and soon. Will I use this recipe again? I may at some point but I already have another naan recipe to try -- a chile-cilantro naan. If anyone out there has a naan recipe they like - please post it or send me a link. I would love to try it.

Wednesday, January 26, 2011

Roast Pork in a Convection Oven

Finished pork with apples
Pork is a traditional "lucky food" served on New Years Day and one I have had on New Years Day since a was a child. Since we were having a small dinner party on New Years, I decided that I wanted a roast pork loin. I wanted to find a large roast and was not able to, instead I brought two small roasts.

My problem turned into an opportunity. I decided to roast the pork two different ways and see which one we liked better.

I made a roast smothered in garlic, rosemary, olive oil, salt and pepper with a rosemary chimichurri adapted from a Fine Cooking grill roasted beef recipe (if you haven't tried it, it is amazing -- one of my many favorites available here: http://www.finecooking.com/recipes/pepper-crusted-beef-roast.aspx) and a pork loin wrapped in bacon served with apples and a red currant sauce.

I adapted the basic recipe for a regular oven for a convection oven. I like the convection oven for roasting meats because I think the circulating air makes a crisp crust with the juices held in. To get the crispy crust I used to cook roasts at 450 degrees for a short period of time and then reduce the temperature. With a convection oven I can cook the roast at a constant temperature and get the same result. The trick is getting the temperature and cooking times correct.

Recipes

Garlic Rosemary Pork

Mix together in a small bowl: 2 cloves of garlic (minced); 2 tablespoons of chopped rosemary; Kosher salt to taste; freshly ground pepper to taste; and one dried red pepper ground (add the red pepper only if you want some spice).

Rub for pork


Rub the mixture on the pork and roast in a convection oven at 325 F/163 C) for approximately 20 minutes per pound until the meat thermometer reaches 160 F/71 C. Remove from oven, cover loosely with aluminum foil and let sit for 15 minutes before cutting.

The pork is read for the oven
Rosemary Chimichurri

Sauté 2 tablespoons of chopped rosemary (fresh not dried) in 1/4 cup of olive oil for 2 minutes. Remove from stove and let cool. Once it is cool, add 3 tablespoons of vinegar (white or white wine), 2 cloves of minced garlic, and 1/2 cup of chopped parsley, and freshly ground pepper (to taste). Serve with the pork.

Bacon Wrapped Pork

I thought what could be better than pork wrapped in bacon. The trick was to have the bacon cooked when the pork was done. I thought of two different ways to do this -- one was to wrap the pork in bacon and sear the pork in a pan prior to putting it in the oven. The second was to slightly cook the bacon before wrapping the pork with it.

I imagined doing the first method and the grease splatters on the stove and me, and I chose the second method. I cooked the bacon slightly before putting on the pork (2 minutes on high in the microwave). To add extra flavor, I made a paste of minced garlic, Kosher salt, and freshly ground pepper to rub on the roast before I wrapped the roast in bacon. I pinned the bacon in place with toothpicks.
Roast covered in garlic, salt and pepper. It's ready for the bacon
Roast with bacon held in place with toothpicks
I cooked the pork at 325 F/163 C) in a convection oven for approximately 20 minutes per pound.

Red Currant Onion Relish

While the pork was roasting, I sauteed half of an onion chopped in 2 tablespoons of butter until the onions started to caramelize. I added 1/2 jar of red currant jelly to the onions and warmed.

Finished red currant onion relish
Apples

During the last 10 minutes of cooking,  put some chopped granny smith apples (I used 3) in the convection oven in the same pan the pork and roasted them slightly.

I served the bacon pork with the red currant onion relish and apples.The red currant onion relish is amazing. I had to taste it to make sure it was good and found myself tasting it multiple times.


Which Pork is Better?

The results-- everyone liked both of the pork roasts. Some people liked the bacon wrapped pork better others the herb smothered pork. Everyone liked the currant onion relish and the chimichurri. My favorite was the bacon pork, with apples, and currant onion relish.


Pork with bacon, apples, and red currant relish. I served it with a side of sour cream mashed potatoes.

Sunday, January 23, 2011

Easy Caramel Popcorn


Easy Caramel Popcorn
Our family loves caramel popcorn and we have tried all kinds of recipes for caramel for our popcorn. This is an easy recipe that makes great caramel popcorn. To quote Katie: "it is full of caramely goodness." I like it because there is a minimal amount of stirring. 

Caramel Popcorn

Ingredients


8 Cups of Popped Popcorn (1/2 cup of unpopped corn)
3/4 Cup (169 g) of Sugar
3/4 Cup (160 g) of brown sugar (packed)
1/2 Cup (125 ml) of corn syrup
1/2 Cup (125 ml) of Water
1 Tsp of Vinegar
1/4 Tsp of Salt
3/4 Cup (170 g) of Butter


Place popped popcorn on parchment paper. 


Combine sugar, corn syrup, water, vinegar, and salt in a 2 quart sauce pan. 

Heat the mixture to a boil over medium-high heat stirring frequently.

Cook to 260 F/127 C degrees on a candy thermometer (or hardball stage).

Reduce heat to low and stir in butter. 


 And stir...


The butter is finally stirred in!
Pour mixture over popcorn.


Either--


1. Make into popcorn balls by buttering hands and make into balls.


OR


2. Put popcorn which is on the parchment paper on a cookie and place in a  250 F/121 C oven. Cook for one hour stirring every 15 minutes. The caramel "bakes" on to the popcorn.

Tuesday, January 18, 2011

Shepard's Pie

Shepard's Pie
I was in Whole Foods on one of my biweekly trips to see what meat/seafood they had on sale. This trip they had ground lamb. I admit it -- it was an impulse buy. I love lamb, but I usually buy a leg and roast it. I had no idea what I wanted to make with the ground lamb-- but that's half of the fun. It gave me an excuse to go through my cookbooks and search the Internet.


I was torn between lamb meatballs (there are some great recipes out there) and Shepard's pie. Since we are expecting snow, the Shepard's pie won (it seems like the prefect snow day comfort food). Also it gave me an excuse to buy a potato ricer I have had my eye on.


I combined several different recipes and ideas and here is what I decided on.

Recipe

Mash Potato Layer


Peel approximately 1 1/2 pounds of potatoes and quarter and cover with water (add a little salt) and cook for approximately 15 minutes in boiling water until fork tender. Drain potatoes reserving 1/2 cup of the potato water.


In the pot the potatoes were boiled in- melt 2 tablespoons of butter and add reserved potato water and 1/2 cup of cream.


Butter, cream, and potato water


Ricing the potatoes

Add mashed or riced potatoes to the pot; mix, and add salt and pepper to taste. (It gives you an excuse to taste the mashed potatoes -- yum!) Set aside

Fluffy mashed potatoes
Lamb Layer


Combine in a Dutch oven:


2 Tbsp of Olive Oil
2 Turnips, Peeled and Diced
1 Medium Onion, Diced
1 Carrot, Peeled and Diced
3 Leeks, Sliced- White and Light Green Parts

Everything is chopped and ready
Cook on medium/low heat until tender (not browned) approximately15 minutes. (At this point you should preheat the  oven to 400 F/204 C).


Add 1 pound of ground lamb and increase heat to medium and cook until no longer pink approximately 10 minutes. Salt and pepper to taste. Drain any excess fat. Add 1 tablespoon of flour. Cook for approximately 2 minutes.


Add:
1 Cup (250 ml) of Beef Broth
1/2 Cup (125 ml) of Dry White Wine
1 1/2 Tbsp of Tomato Paste
1/2 Tsp of Fresh Thyme, Chopped
1/2 Tsp of Fresh Rosemary, Chopped

Cook on low heat for approximately 5 minutes until thickened.


Put it Together

Cover the lamb vegetable mixture with mash potatoes. Place small pieces of butter on top of the mash potatoes and salt and pepper to taste. Place uncovered in oven and bake for 30 minutes. The potatoes should be browned and the dish heated through. My family thought it was good but missing something. (Although Steven did have 2 servings). They are so used to having garlic and cayenne in everything I make-- I think they were missing the spice and the garlic. I thought it was great without it.


The bottom line-- will I make it again? It was a lot of work-- but yes I will make it again. It is the perfect wintry day dish. I may add a bit of garlic next time and some Worcester sauce.... The problem with wintry comfort food--- it is full of fat and calories and you eat it when it is cold out-- too cold to bike the 10 plus miles to work off the calories so you are stuck working out inside..... or putting on your winter layer of insulation.

Friday, January 14, 2011

Eggs Benedict

Eggs Benedict
Ever since I was little, my family has always had Eggs Benedict for special occasions. It was also one of the foods I craved when I was pregnant. Ok- it is one of the foods I crave when I am not pregnant. Well-made eggs Benedict qualifies as a "perfect food". At least in my humble opinion.
I love eggs Benedict even though it is a balancing act in timing-- four separate parts of the dish that need to be made in a relatively short period of time.

Lots of tasks to juggle at once
I have alternated between using Bearnaise and Hollandaise sauce and Canadian bacon and ham. I have always used the Knorr sauce packages because making the sauces from scratch terrifies me. I always think that I am going to get the sauce wrong-- it won't come together and I will have eggs Benedict without a thick fattening French sauce which would be a small tragedy.

Today-- I am going to make the sauce and I am thinking positively so I am toasting the English muffins, poaching the eggs, and cooking the ham as if I am going to be successful!

Hollandaise sauce is a tricky sauce to make-- there are several versions-- one is made over a double boiler with care taken not to get the eggs to hot because the will scramble and not be that wonderful thick sauce. The second is made in a blender. The third is a method advocated by Alton Brown where you cook the egg yolks first, add cold butter to the mixture, and add the lemon juice last (he has it marked as easy). Ok there is a fourth- it is from a packet and is foolproof-- I know I could make it in my sleep.

As I write this I am tempted to forget this blog and just go out and buy the sauce packet. Both Hollandaise and Bearnaise sauces scare me there are so many things that can go wrong-- oh well I am repeating myself. I have made homemade mayonnaise before (absolutely amazing stuff I might add) and it is an emulsion just like Bearnaise and Hollandaise so how hard could it be? Except that mayonnaise is never heated so you don't have to worry about your eggs scrambling or your sauce curdling or your emulsion failing to form.

The first question is whether I will make the one of the easy versions or the full-fledged-risky double boiler sauce. When I have a quandary like this, I usually turn to my Joy of Cooking, one of the first cookbooks I owned. Since my early days of cooking, my cookbook collection has grown. I read them like most people read novels, even though I hardly ever follow the recipes- except when I bake (and sometimes not even then). I am nervous enough with this sauce to follow the recipe (at least the first time I make it).

Ok I am not a coward so I am making the full fledged version-- without a safety net. I can do this.

Recipe (Adapted from Joy of Cooking)

Melt 10 tablespoons of butter (skim the foam off of the top and keep warm).

Place in the top of a double boiler or in a large stainless steel bowl:

3 Large Egg Yolks
1 1/2 Tbsp of Cold Water

Off of the stove, beat the yolks with a whisk until light and frothy. Place the top or bowl over (not in) barley simmering water and continue to whisk until the eggs are thickened, 3 to 5 minutes being careful not to let the eggs get too hot. (Note-- it took my mixture a lot longer than 5 minutes. I felt like I whisked forever).


Remove the pan or bowl from the hot water and continue to whisk to allow the mixture to cool slightly. You guessed it-- while whisking the mixture slowly add the melted butter.


Next whisk in:

1/2 to 2 Tbsp of Lemon Juice (I like mine lemony so I added 2 tablespoons)
(Dash of hot pepper sauce-- optional)  I added freshly ground cayenne pepper
Salt and white pepper to taste

Now that the sauce is done-- make your Eggs Benedict!
Toasted English muffin, add ham, and poached egg

The finished product!
So was it worth the work?  My family says yes (but then they weren't the ones whisking!) The sauce is better than the sauce from the magic package but it is a lot of work. Will I make it again? Yes-- for special occasions and with the promise of my family to help with the whisking.

Tuesday, January 11, 2011

Homemade Marshmallows

Toasting homemade marshmallows
I have read several marshmallow recipes stating that homemade marshmallows are so much better than store bought and are easy to make. I tried them the first time and they were an abysmal failure. They didn't fluff. They were a thick mass of yellow goo. It was a disgusting inedible mess.  I was not going to let the marshmallows win. I decided to make them again. The second time I made them they were fantastic. So much better than the store bought. The key to making them was a reliable candy thermometer and a high power mixer.I tested my candy thermometer by boiling water and verifying that it read 212 F/100 C.

Marshmallow Recipe

(From Alton Brown  His recipe is available here: http://www.foodnetwork.com/recipes/alton-brown/homemade-marshmallows-recipe/index.html)
  • 3 Packages Unflavored Gelatin (For a Total of 3/4 oz or 21 g)
  • 1 Cup (250 ml) Ice Cold Water, divided
  • 1 1/2 Cup (12 oz) (225 g)  Granulated Sugar
  • 1 Cup (250 ml) Light Corn Syrup
  • 1/4 Tsp Kosher Salt
  • 1 Tsp Vanilla Extract
  • 1/4 Cup (30 g) Confectioners' Sugar
  • 1/4 Cup (31 g) Cornstarch
  • Nonstick spray
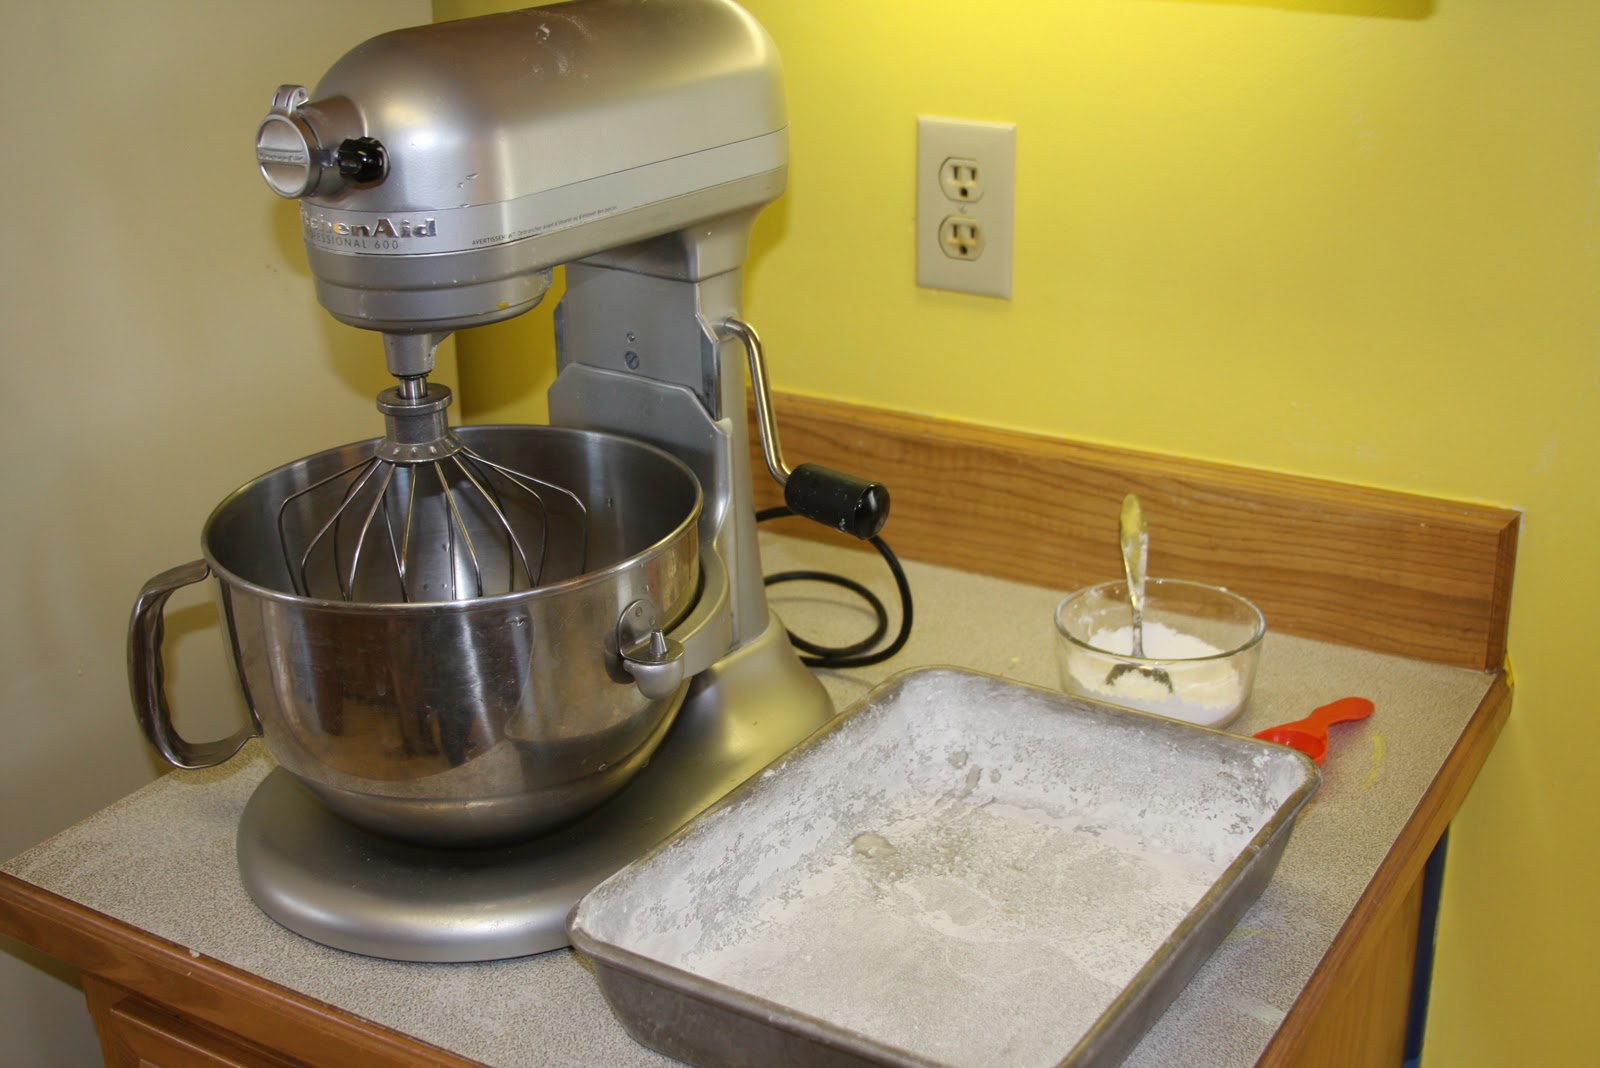
Combine the confectioners' sugar and cornstarch in a small bowl. Lightly spray a 13 by 9 inch (33 cm by 23 cm) metal baking pan with nonstick cooking spray. Add the sugar and cornstarch mixture and move around to completely coat the bottom and sides of the pan. Return the remaining mixture to the bowl for later use. Set the prepared pan aside for later.

Place the gelatin into the bowl of a stand mixer along with 1/2 cup (125 ml) of the water. Have the whisk attachment standing by.


Everything is ready to go
In a small saucepan combine the remaining 1/2 cup (125 ml) water, granulated sugar, corn syrup and salt. Place over medium high heat, cover and allow to cook for 3 to 4 minutes.

Covered and cooking
Uncover, clip a candy thermometer onto the side of the pan and continue to cook until the mixture reaches 240 F/ 116 C), approximately 7 to 8 minutes.  (Note-- It took my mixture a lot longer than 7 minutes to reach the correct temperature).

All ready

It's boiling but it isn't at the right temperature
Still not there.
Once the mixture reaches this temperature, immediately remove from the heat.
I put the pouring shield on the mixer
Turn the mixer on low speed and, while running, slowly pour the sugar syrup down the side of the bowl into the gelatin mixture.

Adding the sugar mixture. It is HOT
Once you have added all of the syrup, increase the speed to high.

Mixing
Continue to whip until the mixture becomes very thick and is lukewarm, approximately 12 to 15 minutes. Add the vanilla during the last minute of whipping.
Almost done
When ready, pour the mixture into the prepared pan, using a lightly oiled spatula for spreading evenly into the pan. (The mixture is sticky!)
Attempting to put the sticky mixture in the prepare pan

Still working on it!
Dust the top with enough of the remaining sugar and cornstarch mixture to lightly cover. Reserve the rest for later. Allow the marshmallows to sit uncovered for at least 4 hours and up to overnight.

Turn the marshmallows out onto a cutting board and cut into squares using a pizza wheel dusted with the confectioners' sugar mixture.

Trust me-- the pizza wheel is so much better than using a knife
Once cut, lightly dust all sides of each marshmallow with the remaining mixture, using additional if necessary. Store in an airtight container for up to 3 weeks.

These marshmallows are amazing in hot chocolate and incredible toasted.

A perfectly toasted marshmallow

Do I think the marshmallows are worth the work? Yes they are. I will be making them again. Next time I will add a different flavoring- maybe almond.

Sunday, January 9, 2011

Spiced Apple Cranberry Cider

It's snowing in Tulsa- time to make some spiced cider
It's a cold wintry day in Tulsa so I decided to warm us up with some hot spiced cider. Not just any cider- apple cranberry cider. I love cranberry juice and I think it makes a great addition to spiced cider. I also love the way it makes our house smell.  


Recipe

4 Quarts (2 Liters) Apple Cider
2 Quarts (2 Liters) of a Cranberry Juice Blend
Rind of One Orange
1 Cinnamon Stick
1 Tsp of Whole Cloves
1/2 Tsp Whole Allspice
1/8 Tsp Ground Nutmeg
1/4 Cup (53 g) of Brown Sugar


Combine all ingredients in a large saucepan over low/medium heat and simmer for a couple of hours. (Some people who are tidier than I am put the spices in cheesecloth tied with string so the spices can be easily removed). You could also put in a crock pot and set it on low. Your house will smell amazing!


Note-  I like my spiced cider tart so I added a lot of cranberry juice. If you don't like your cider as tart, half the amount of cranberry juice you add. Katie (my daughter who is also my official taste tester) has declared it "wonderful."

To make this an adult beverage- add dark rum, bourbon, tuaca, or spiced rum (to taste) to each glass.