Thursday, December 12, 2013

Italian Sausage and Pasta in Broth

Italian Sausage Pasta
Ok. I just threw this one together and after we started eating it my family told me to blog it. The inspiration for this dish is the sausage pasta dish at Trezo Mare. It is really really good. It is a light dish that contains Italian sausage. I know, it seems impossible to have a light dish with sausage. I use Scimeca's Italian sausage. It comes in mild, medium, and spicy. Pick the one you want for the spiciness of the dish. This dish was so good we all had seconds and maybe (shhh don't tell) thirds. It was a good thing that it was a running day.
I have two sets of pictures one set from the first time I made it and the second when I went back and tweaked it.  The first time I made it with button mushrooms and the second time with baby bellas. The second time I also doubled the amount of mushrooms. Did I mention how good it was? It is so good that I craved it for days and ended up making it for breakfast on a Saturday morning. If I had some summer ripened tomatoes I would have diced about three and thrown them in with the chicken broth. Also for a twist, I imagine some fresh spinach or kale thrown in with the broth would be delicious.

Italian Sausage Pasta

1 Pound (.45 kg) of Italian Sausage
1/2 Onion (160 g), Thinly Sliced
One Red Pepper (160 g), Sliced
4 -8 oz. (113-227 g) of Mushrooms, Sliced
1 Can (397 g) of Chicken Broth
1 Box (340 g)  of Pasta, Cooked and Drained
Pepper, To Taste
Basil
Parmesan Cheese

Crumble sausage into large skillet. Cook over medium heat until it begins to cook. Meanwhile, cook the pasta. Once the sausage begins to cook, add the onions, pepper, and mushrooms.

At this point the house smells incredible.
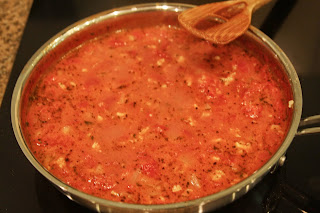
Cook until sausage begins to brown and the veggies are softened. Add the broth to the skillet and simmer.

Almost ready for the pasta
When the pasta is ready, add it to the skillet. Mix well and season with pepper. Take off the heat and add the basil and cheese. And that's it!

Skillet of pasta
The bottom line, will I make this again? You mean more than the two times I already have? Yes, it is lovely and so easy.

Sunday, November 24, 2013

Cranberry Sorbet

Cranberry Sorbet
I used to have Thanksgiving dinner at my house and I would cook and cook... and cook. Not that I minded. I really like spending time in the kitchen. Now, we go to a friends house (thanks Jeanne) and I only make a couple of dishes. This year I have so much extra time, we are running a 5K in the morning. I know it is amazing (1) that we have that much time and (2) that we are choosing to run outside in the cold. On the other hand that is 300 calories burned. 
So what will I be making? I have my Thanksgiving dishes that I make every year, chocolate bourbon pecan pie (it is incredible and it even has a nut crust) and cheese garlic grits. Yes, I will make these this year, because otherwise I would have a family mutiny. I am also making candied bacon (maybe I should run the one mile fun run after the 5k as well).
In addition, I decided to make something different this year, cranberry sorbet. (Yes, it sounds like a Prince song.) It took awhile to get the recipe right. I wanted a tart sorbet but not too tart. I wanted the sorbet to have some sweetness as well. So I decided on a pink grapefruit / cranberry sorbet. The result was right on. It is tart but not too tart and not too sweet like an earlier version I made. I can already imagine the sorbet in a glass with champagne for the adults and ginger ale for the kids. Yum!

Pink Grapefruit Cranberry Sorbet

1 1/2 Cup (300 g) of Sugar
1 1/4 Cup (300 ml) of Water
3 Pieces of Grapefruit Peel
12 oz. (340 g) of Cranberries
3/4 Cup (175 ml) of Grapefruit Juice
Bring water, sugar, and peel to a boil. Add cranberries and boil for 10 minutes stirring occasionally. 
Boiling the cranberries
The cranberries will have popped and will be tender. Remove the grapefruit peel. Puree in a blender or a food processor. Add  the grapefruit juice and pour through a sieve. 

Straining the cranberries
Refrigerate overnight. Pour into an ice cream maker. Freeze according to manufacturer's instructions. 
The bottom line: will I make this again? Yes. It is awesome. 

Friday, November 22, 2013

Sausage Balls

Freezing the sausage balls
I love sausage balls. They are so easy and so good.  I like the fact that I can make a bunch of them and freeze them.  If I have some unexpected guests, I have a delicious appetizer ready to go.  I have also serve these for breakfast with biscuits.  Yum!
I like them spicy. If you want them to be spicy, use spicy sausage. So easy. You don't have to worry about adding additional spices they are in the sausage.  If you want to go all out you can make your own sausage. (Yes, I have made my own sausage and yes it is amazing).

Sausage Balls

1 lb (.45 kg) of Sausage
8 ounces (227 g) of Cream Cheese
1 1/4 Cups (175 g) of Baking Mix
1 1/4 Cups (155 g) of Cheddar Cheese

All of the ingredients ready to mix

Mix all of the ingredients together with a dough hook.

All of the ingredients mixed together

Make into balls and place on a cookie sheet. Bake in a 400F/204C/ Gas Mark 6 oven for 20-25 minutes. Or freeze and then place in a plastic bag.  When ready to cook, bake in a 400F/204C/ Gas Mark 6 oven for 30 minutes.

The bottom line: will I make this again? Yes, I love them. I have a couple of bags of them frozen in my deep freezer.

Saturday, November 9, 2013

Spinach Balls

Spinach Balls
Need a really awesome appetizer that is easy to make? I love these.  People who hate spinach love these.

Spinach Balls

1 Package (283 g) of Spinach, Cooked, Drained, and Squeezed
1/4 Cup (57 g) of Butter, Melted
1 Cup (200 g) of Stuffing Crumbs (I like Pepperidge Farm)
1/2 Cup (50 g) of Parmesan Cheese, Grated
Salt and Pepper, To Taste
3 Whole Eggs, Beaten

Mix all of the ingredients together and refrigerate until mixture sets up.

Just dump the ingredients into a bowl.
Form into balls.  Bake in a 350F/176C/Gas Mark 4 oven for 10-15 minutes.
All mixed together
If you are going to freeze them, put on a cookie sheet and freeze. Once they are frozen, put into a plastic bag. When ready to bake, do not defrost bake in a 350F/176C/Gas Mark 4 oven for 20 minutes.

The bottom line will I make these again? Yes.  I love these. I make a double batch and freeze them for later.

Sunday, November 3, 2013

Cheese Olive Puffs

Cheese Olive Puffs
I like these a bit spicy. I make a double batch of these and freeze them.  Right now, I have a whole bunch of these in my freezer ready for last minute guests or a special occasion.

Cheese Olive Puffs

2 Cups (225 g) of Grated Cheddar Cheese
1/4 Cup (58 g) of Butter
1/2 Cup (63 g) of Flour
1/4 Tsp of Salt
1/2 Tsp of Paprika
Cayenne Pepper, to Taste
24 Pimento Stuffed Olives

Mix all of the ingredients together except for the olives.


Pinch off a bit of dough and wrap it around the olive. Place the dough covered olive on a cookie sheet. Bake in a 400F/204C/Gas Mark 6 oven for 10-15.

Or freeze on the cookie tray and then transfer to a plastic bag. When ready to serve, do not defrost, place on a cookie tray and bake in a 400F/204C/Gas Mark 6 oven for 20 minutes.

The bottom line, will I make these again? Yes, I love these. I might have make them a bit to spicy this last time.  Next time I am going to try using smoked paprika.


Sunday, September 22, 2013

One Pot Bacon Mushroom Mac and Cheese

Mac and cheese, the ultimate comfort food
We are still rehabbing our kitchen. I don't think we will ever be done (grrrrrr). But the stove it done and I love my induction stove top. It is incredible. I bought a lot of new pots and pans to work with the stove and I rediscovered cast iron. I don't think I will be parted from it again. Not only is it a great conductor of heat and easy to clean but it also add a bit of iron to our food. We need iron and every little bit helps.

The most used pan in my house is a cast iron skillet. I use it for my one pot mac and cheese, the ultimate comfort food. This dish can be tailored to your tastes and mood. You can switch out the onions for leeks or green onions.  Don't like mushrooms? Then don't add them. The cheeses can be switched around based on what you feel like or more likely in our house, what you have in the refrigerator. One of these days I am going to add bacon and tomato. So what is the inspiration for this dish?  I became obsessed with this dish after having mac and cheese at Anna's Oven (50% of the profits from this restaurant go to charitable causes). I always get the roasted chicken with a side of mac and cheese.

One Pot Bacon Mushroom Mac and Cheese

5 Tbsp (70 g) of Butter
4 oz. (113 g) of Sliced Mushrooms (I used baby bellas)
1/2 Small Onion, Diced
4 Slices of Bacon, Crispy
1/4 Cup (31g) of Flour (Depending on how thick you want your mac and cheese)
6 Cups (1.4 l) of Milk
12 oz. (340 g) of Pasta
Salt, Pepper, and Cayenne, To Taste
4 Cups (500 g) of Shredded Cheese (I used a mixture of White Cheddar and Mozzarella)
1 Tsp of Dijon Mustard
1 Cup (125 g) of Breadcrumbs or Panko
1/2 Cup (63 g) of Shredded Cheese (I used Parmesan)

Preheat your broiler. Melt the butter in a large oven safe skillet. Add the mushrooms and onions and cook until softened.
Sautéing the mushrooms and onions.
Whisk in the flour and them slowly whisk in the milk.
Whisking in the flour
Once the milk is added, raise the heat and bring the milk mixture to a simmer. Add the pasta and the salt, pepper, and cayenne. Watch the mixture so that it doesn't boil over. Cook the pasta, stirring frequently, until tender.
Cooking the pasta
The time varies depending on the pasta you use. Don't worry if the mixture is a bit thin, it will thicken when you add the cheese. Add the mustard, bacon, and cheese stirring until combined.

Ready for the oven!
Taste and adjust seasonings. Cover with breadcrumbs and 1/2 cup of cheese. Place under the broiler until golden brown on top (about 2 minutes).
Done!
The bottom line: will I make this again? Oh my goodness yes. This is so yummy.


Saturday, September 14, 2013

Cedar Planked Bacon Wrapped Chicken

Cedar Planked Bacon Wrapped Chicken
Wow that is a lot to say.  There is a lot of tastes to this dish. First let me say it is really is wonderful. But how could it not be? It has bacon. Here is my advice for making this dish great:
  • Start soaking the cedar plank early. I like to soak it for about an hour. If I am making it on a weekday night, I soak the cedar plank as soon as I get home from work. 
  • I like crispy bacon so I precook the bacon in the microwave for one to two minutes before I wrap it around the chicken. I also use a thicker sliced bacon because well, you get more bacon. 
  • I use chicken thighs because they stay juicy. I also use bone in with the skin on. I think they are tastier. It is certainly easier to use skinless boneless thighs and they roll up nicely. But I think that is cheating....
  • I use a meat thermometer to get the chicken cooked to the correct temperature. I hate cutting into raw chicken. My own personal belief is every kitchen should have a digital scale and a digital meat thermometer and a really big cast iron skillet.
  • The bbq sauce is key.  If I am too lazy to make my own which happens more than I would like to admit, I use a good bottled sauce. My current favorites are Arthur's Bryant's Sauce (you can't go wrong with the classics), Head Country BBQ Sauce and Wabash BBQ Sauce (I think you can only get this in and around Kansas City).
Cedar Planked Bacon Wrapped Chicken

Chicken Thighs (2 per person)
2 Pieces of Bacon per Chicken Thigh
Salt
Pepper
Paprika (Smoked or Sweet or Both)
BBQ Sauce

Presoak the cedar plank. Preheat grill to medium heat. Precook your bacon for 1-2 minutes (if you want crispy bacon). Salt, pepper and paprika each chicken thigh. Wrap the chicken thigh in bacon. 
Ready for the grill
Place the chicken on the cedar plank and place the cedar plank on the preheated grill. 

Chicken on the grill
Grill for approximately 15 minutes and then brush with bbq sauce.
Basting the chicken

Insert meat thermometer at this point. Grill for 10-15 more minutes (until chicken reaches an internal temperature of  165F/74C). While the chicken is grilling continue to baste with bbq sauce. Remove from grill and let rest for 5 minutes and then dig in.

The bottom line: will I make this again? Oh yes, I almost didn't get pictures. It smelled incredible and tasted even better. The best part: Steven did the grilling. 
 

Tuesday, September 3, 2013

Microwaved Salmon


Lékué
I know what you are thinking.... microwaved salmon.... yuck! But wait! I microwaved it in silicone cookware. Yep- I bought a Lékué and decided to try it out. I decide why not go all out and start with salmon? I brought 1.5 pounds (680 g) of salmon and cut it into three pieces. It cooks in minutes so why not try salmon three different ways? My thoughts it is utterly amazing. I am not often surprised but I was by this microwave pot.You can also use it in the oven but I was much more interested in the microwave. And the clean up?  You rise it and put it in the dishwasher. That's it.

Salmon with Broccoli 

Katie loves broccoli so I decided to make salmon with broccoli.

Add in the following order:

4 Tbsp of Water
1 Tsp of Soy Sauce
1 Tbsp of Olive Oil
2 Cups (125 g) Broccoli Florets
Salt and Pepper, to Taste

Close top and microwave 4 minutes. Remove


Add .5 lbs (450 g) Salmon
1 Tsp of Olive Oil
Freshly Ground Pepper
1 Tbsp of Water

Close top and microwave 3 minutes.

I thought the broccoli was too well done but Katie really like it. The salmon was amazing. Next time I will cook the broccoli and salmon together.

 Salmon with Onion, Tomato and Basil

Add in the following order:

1/2 Cup (60 g) of Diced Onions
1 Tomato (180 g)
Basil, Chopped
4 Tbsp of Water
1 Tbsp of Oil
.5 lbs (450 g) Salmon
Salt and Pepper, to Taste

Close top and microwave 3 minutes


Finished product was salmon in broth lovely! Steven added capers to his and really liked it.

Salmon with Lemon and Dill 

Add in the following order:

2 Tbsp Water
2 Tbsp of Lemon Juice
1 Tbsp of Olive Oil
.5 lbs (450 g) Salmon
Broccoli
Salt and Pepper
Dill
Lemon Zest (from 1/2 of a lemon)

Close top and microwave 3 minutes.

I added broccoli this time with the salmon this time. It was cooked perfectly.

The bottom line: It worked. Wonderfully and quickly. Who knew that microwaved salmon could be so good. I may have to try the microwave omelet maker next. Just think an omelet in 2 minutes!

Sunday, June 23, 2013

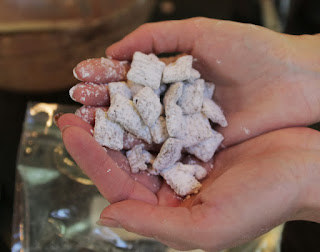
Nutella People Puppy Chow

Nutella people puppy chow
I love nutella. I am aware that there are some people who do not like the incredible mixture of chocolate and hazelnuts. I do not understand this but hey who am I to judge? I normally make people puppy chow for last minute events or poor planning. I had just one of those events: our family ran a 5K in the morning (I like to eat so I run) and at 2:00 we needed to have a dish ready. While I was running, I was thinking about people puppy chow and decided I really wanted nutella chow. (I need some motivation to keep running. Although my zombie app usually is enough motivation).

On the way home we bought a jar of nutella and I searched the Internet for recipes. Well, the first time I made it I followed what everyone else did: a mixture of butter, nutella, and chocolate chips. It never made it on to the cereal. I thought the glorious taste of the nutella goodness was overpowered by the chocolate chips. I was running out of time. But I was not deterred. I decided to wing it. I melted some butter, added nutella and voilà it was what I was looking for and it was so easy. All I can say is yum! I will do something else with other mixture; I just don't know what yet. No waste; just a repurposing of resources.


Nutella Puppy Chow

1/4 Cup (57 g) of Butter
1 Cup (280 g) of Nutella
13 Cups (400 g) of Chex or Similar Cereal (One Box)
3 Cups (345 g) of Powdered Sugar


Place cereal in a large bowl. Place powdered sugar in a large paper bag. Melt the butter in a saucepan over low heat. Add nutella and stir constantly until well mixed. (I used a double boiler and it worked like a charm. I think you could also do this in a microwave).
Nutella and butter
Pour chocolate mixture over cereal and stir until cereal is coated.

Coating the cereal with nutella 


Cereal coated in chocolate
Pour cereal into bag with powdered sugar. Shake until the cereal is covered in powdered sugar. That's it. It is ready to eat.


All that lovely powdered sugar
The bottom line: will I make this again? Yes, as long as it leaves my house. Immediately. Wow. Once I start eating this I can't stop.

Saturday, May 18, 2013

Canned Clam Pasta

Clam pasta
We eat a lot of clams. Not only are they tasty; they are a great source of heme iron. Heme iron is iron from animal sources. It is more readily assimilated by the body.  Since we are always trying to increase our iron stores, we try to have clams once a week. This is our favorite clam dish. Needless to say I change it around a lot. This is the winter version of the dish with canned tomatoes and dried herbs; in the summer I use peeled tomatoes and fresh herbs for a truly outstanding dish. Feel free to add more garlic and change out the spices. I like this sauce with a lot of broth.  If you don't want your pasta swimming is sauce, squish the whole tomatoes and add half of the tomato juice. The important thing is not to over cook the clams, five minutes out to do it. Sometimes I add a bit of freshly grated Parmesan cheese. This should feed four people; it feeds the three of us.

Clam Pasta

1 Tbsp Oil Olive
2 Tbsp Butter
3 Garlic Cloves, Minced
1/4 Small Onion, Diced
28 oz (794 g) Whole Tomatoes in Juice
2 6.5 oz (184 g) Cans of Clams, Divided
1/8 Tsp Oregano, Rosemary, and Thyme
1/4 Tsp Parsley and Basil
Dash of Red Pepper Flakes (Optional)
Salt and pepper to taste
16 oz (454 g) Pasta, Cooked

Place olive oil and butter in a medium sauce pan over medium low heat. Add garlic, onions, salt, and pepper and saute just until garlic starts to brown.
I love the smell of cooking onions and garlic

Add the squished whole tomatoes and juice. Also add the juice from two cans of clams. Raise the heat to medium and add the dried spices and pepper flakes. Add salt and pepper to taste. Simmer about 10 minutes.

Everything is in there except the clams
 Add clams and heat for 5 minutes.
Just cooking the clams until they are done

Serve over pasta.

The bottom line: will I make it again? Yes, I can't wait until summer tomatoes are available and I will be make this with fresh tomatoes and freshly cut herbs.....

Sunday, April 28, 2013

Homemade Hamburger Helper


mmmmmm Hamburger Helper
 My daughter loves hamburger helper and I do too. I am not real happy with the hamburger helper from a box. I just don't believe in powdered cheese. Really- powdered cheese? That is worse than "cheese food." I think this is so much better than the boxed stuff. Basically it is browned hamburger, milk, water, spices, pasta, and cheese. It is the perfect weeknight one dish meal.


Homemade Hamburger Helper
1 lb (.45 kg) of Ground Beef
2 1/2 Cups (600 ml) of Milk
1 1/2 Cups (360 ml) of Hot Water
2 Cups (280 g) of Pasta
1 Tbsp of Cornstarch
1 Tbsp of Chili Powder
1 Tsp of Onion Powder
2 Cloves of Garlic, Minced
1 Tsp of Sugar
1/2 Tsp of Salt
1/2 Tsp of Fresh Cracked Pepper
3/4 Tsp of Paprika
1/4 Tsp of Cayenne Pepper
2 - 2 1/2 Cups (240-300 g) of Shredded Cheese


Heat a large skillet over medium-high heat. Spray with cooking spray and add the ground beef.
Lean ground beef
Brown until cooked through and no longer pink. Carefully pour off any fat.
Browned ground beef
Add the pasta, milk, water and spices and stir to combine.

I premeasure and mix the spices
Bring to a boil and turn the heat down to simmer.

Ready to simmer
Cover and cook for 10-12 minutes, or until the pasta is tender. Add the cheese and stir to combine.
Freshly grated cheese
 Serve immediately.

The bottom line: will I make this again? Yes. We have this about once a month. I mix and match the past, cheeses, and spices. The only limit is your imagination. 

Sunday, March 3, 2013

Beef Stronganoff


Beef Stronganoff over Egg Noodles
 I love beef stronganoff. So does Katie but she loves anything that has sour cream. I also make this hamburger instead of chuck roast. It's all good.  My secret to an awesome and creamy stronganoff is cream cheese. I use light cream cheese and sour cream and it is still amazing. I prefer fresh mushrooms (baby portabellas are my favorite) but canned mushrooms will work too. If you want a thicker sauce, add a 1 teaspoon of corn starch with the beef broth. For a special treat use steak as instead of chuck roast and full fat sour cream and cream cheese. 

2 lbs (.9 kg) Beef Chuck Roast, Cut into Chunks
Salt and Pepper, To Taste
4 Tbsp of Butter
2 Tbsp of Olive Oil
1 Medium Onion, Diced
8 oz (227 g) of Fresh Mushrooms, Sliced 
3 Garlic Cloves, Thinly Sliced
1 Can (10.5 oz/ 300 g) of Beef Broth
3/4 Tsp of Mustard
1 Tbsp of Worcestershire Sauce
2/3 Cup (160 g) of Sour Cream
3 oz. (85 g) of Cream Cheese
Salt and Pepper, To Taste
Egg Noodles (Or Rice), Cooked

Season beef with salt and pepper. In a large skillet over medium heat, add the butter, oil and beef. Quickly brown the beef and remove.

Add the onions, mushrooms, garlic, and a little bit of salt and pepper and sauté for 3 to 5 minutes. Add meat and pour in beef broth.


Bring to a boil, stirring constantly. Lower the heat and stir in mustard and Worcestershire sauce. Cover and simmer for 1 hour or until the meat is tender.

Meanwhile cook the egg noodles. Five minutes before serving, stir in the sour cream and cream cheese. Heat briefly, taste, and add salt and pepper to taste.

The bottom line: would I make this again? Yes. I love beef stronganoff. 

Friday, February 22, 2013

New England Clam Chowder


The perfect bowl of clam chowder
 There is a great debate over which is better New England or Manhattan Clam Chowder. There is no such debate in our house. We all agree that New England Clam Chowder is superior. I think I made Manhattan Clam Chowder once. If I am going to make a tomato based seafood stew/soup it is going to be a bouillabaisse or cioppino. This is a clam chowder recipe that has been developed over years. I finally measured everything as I made it so that Katie could make it someday. I think it her favorite soup, at least for now. The secret is the seasonings. I know it looks like a lot of herbs and it is. But it is awesome and just right. Also the carrots add just a bit of sweetness to the soup. I think the perfect balance with the herbs. Every once in awhile, I add a bit of cayenne- just to spice up the soup. I don't like celery in my clam chowder but if you do go ahead and add some diced celery with the carrots.  
The herb mixture


New England Clam Chowder

3 Slices of Bacon, Finely Sliced
1/2 cup (75 g) of Onions, Diced
1/2 Cup (75 g) of Carrots, Diced
3 Small Potatoes (450 g), Peeled and Diced
3 Garlic Cloves, Minced
1/8 Tsp Each of Dried Oregano, Parsley, Dill, Basil, and Rosemary
1/16 Tsp Each of Dried Marjoram, Tarragon and Thyme
1 Tbsp Flour
2 Cans (6.5 oz. 184 g each) of Clams, Chopped
1 Cup (240 ml) of  Clam Juice (You should have enough from the Canned Clams)
1 Cup (240 ml) of Milk
1/2 Cup (120 ml) of Half and Half
1/4 Tsp of White Pepper

In a heavy-bottomed dutch oven or large sauce pan, sauté bacon.
Bacon and butter is there anything better?
Once bacon is starting to brown and is releasing its grease, lower heat and add onion, carrots, potatoes, garlic and the herbs.
Everything chopped and ready to go
Heat for approximately 5 minutes, stirring occasionally.
An amazing mixture
(Take a moment to savor the incredible mix of bacon, onion, garlic, and herbs). Do not allow to brown. Drain clams and set aside, reserving the juice. Slowly stir in the flour and clam juices. Bring to a boil; reduce heat. Add the half and half and milk and simmer 20-30 minutes until the potatoes are tender.
A low slow simmer works best
Add white pepper and clams. Heat on low until clams are heated through approximately 5 minutes. Do not allow to boil, as this toughens the clams. 

The bottom line: will I make this again? Yes, I love it. This is my favorite clam chowder. To quote my husband "it rocks."